Markdown View using the Racket editor%
The Racket text% editor class can be used to display multi line text with formatting, such as fonts and colors; it is however, somewhat difficult to set it up and use its formatting capabilities. This blog post shows how to build a text view which allows inserting markdown text and the result will be formatted, with headers, links and images.
Building a Markdown viewer with a complete set of features is a topic that is too complex for a blog post, but the techniques presented here can be used to add rich text controls to a GUI application. They are especially useful for displaying user instructions with images and links the user can click on.
Text Editor Classes Overview
Below is a basic example, which sets up a simple window displaying a text% instance with some text. It creates a toplevel frame for the application, a canvas to display the text and a text instance, which is used to hold the text to be displayed.
1 2 3 4 5 6 7 8 9 10 |
#lang racket/gui (define toplevel (new frame% [label "MD View"] [width 400] [height 300])) (define canvas (new editor-canvas% [parent toplevel] [style '(no-hscroll)])) (define text (new text%)) (send canvas set-editor text) (send text auto-wrap #t) (send text set-padding 10 10 10 10) (send toplevel show #t) |
Strings cannot be directly inserted into the text editor, instead, string-snip% objects need to be created for this purpose. For example, the code below will insert a paragraph of text:
1 2 3 4 5 |
(define lorem-ipsum #<<EOS Add text paragraphs here EOS ) (send text insert (make-object string-snip% lorem-ipsum)) |
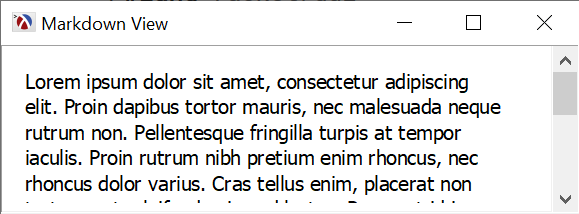
The output of this program is shown below. It is not particularly interesting, but even this simple program will be able to re-flow the text to fit the display size:
Applying styles to the text
The appearance of text in an editor can be changed by applying a style-delta% to a section of the text in the text editor. A style-delta% is an object which describes how the text appearance should change from the style which is already set, that is, it can be set to change the color, or size of the font, without affecting the background color or the font family.
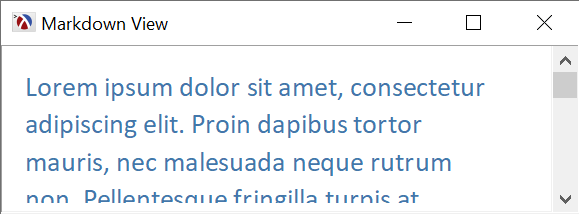
There are many options that can be changed on a style-delta%, but here is a small example, which changes the font family, makes the font bigger and colors the font blue:
A style delta by itself does not do anything, but it can be applied to a section of the text using the change-style function. While we’re at it we can write a small helper function which inserts a string in the editor and applies a style to it:
We can now insert our text paragraph directly with the custom style, to obtain the result below:
1 |
(insert-and-apply-style text lorem-ipsum custom-style) |
Stacking style deltas
Multiple style-delta% objects can be applied to a section of the text, and this can be useful when we want to stack them. For example, we can define a style delta which makes the text bold:
1 2 |
(define bold-style (make-object style-delta% 'change-bold)) |
… and we can refine out function to apply a list of styles instead of just one:
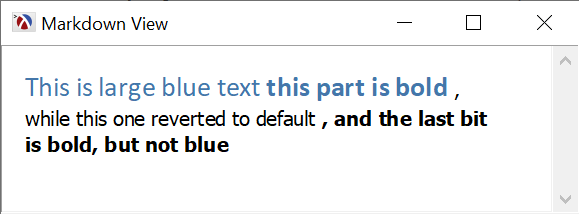
With this, we can call this function multiple times, to apply a different set of styles to each section of the text we want to insert:
1 2 3 4 |
(insert-and-apply-styles text "This is large blue text " (list custom-style)) (insert-and-apply-styles text "this part is bold " (list custom-style bold-style)) (insert-and-apply-styles text ", while this one reverted to default " '()) (insert-and-apply-styles text ", and the last bit is bold, but not blue" (list bold-style)) |
Markdown Markup
We can define many style deltas and use the insert-and-apply-styles function to construct an arbitrarily formatted text for the text editor. However, it is not a convenient method to use (even if we would make the name of our function shorted. It would be nice if we could define a function which takes markup from the text and formats it. So, for example, inserting a text such as:
1 2 3 4 5 6 7 8 9 10 11 12 |
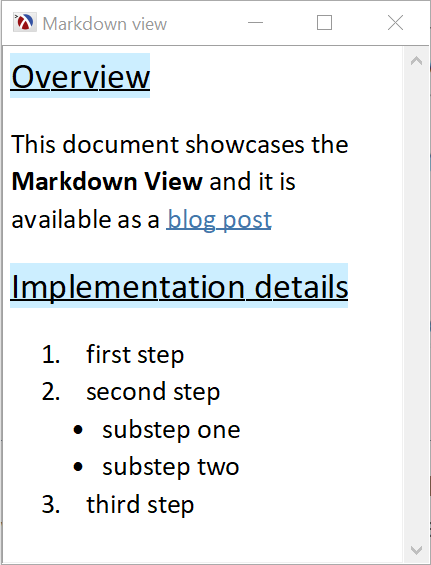
# Overview This document showcases the **Markdown View** and it is available as a [blog post](https://alex-hhh.github.io/2020/05/markdown-view.html) # Implementation details 1. first step 1. second step * substep one * substep two 3. third step |
would produce the following content in the text view, complete with a click-able link for the “blog post” part of the text:
The format of the text above is, of course, not chosen arbitrarily, it is Markdown formatted text, and the nice thing about this, is that there is already a Racket package written by Greg Hendershott which can parse such documents and produce a data structure which can be used to construct the actual styling in the text editor:
1 2 3 4 5 6 7 8 9 10 11 12 13 14 15 16 17 18 |
> (require markdown) > (define md-text "# Overview ...") > (parse-markdown md-text) '((h2 ((id "overview")) "Overview") (p () "This document showcases the " (strong () "Markdown View") " and it is available as a " (a ((href "https://alex-hhh.github.io/2020/05/markdown-view.html")) "blog post")) (h2 ((id "implementation-details")) "Implementation details") (ol () (li () "first step") (li () "second step" (ul () (li () "substep one") (li () "substep two"))) (li () "third step"))) |
Using Markdown as the Markup Format
To use Markdown formatting in the text editor, we need a function which takes a text string containing Markdown formatting and issues the correct calls to insert-and-apply-styles to setup the document formatting correctly.
Bold, Italic and Monospaced Text
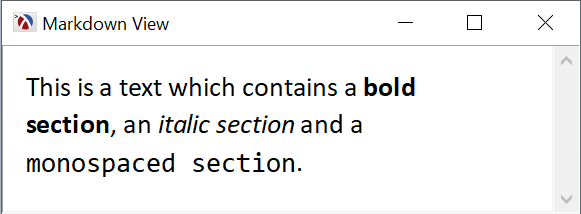
Even though it is considered a simple document format, Markdown can still be somewhat complex, so we’ll start building the markdown view incrementally. The first step is to recognize text which contains bold, italic and code text, in strings such as:
1 2 |
This is a text which contains a **bold section**, an *italic section* and a `monospaced section`. |
Calling parse-markdown with the previous text, produces the output:
1 2 3 4 5 6 7 8 9 |
'((p () "This is a text which contains a " (strong () "bold section") ", an " (em () "italic section") " and a " (code () "monospaced section") ".")) |
The data structure is a list of items (there is only one item in there since we only had one paragraph). Each item is a list, where the first element is the name of the item, in our case this is p, which stands for “paragraph”, a list of attributes, which is empty for our paragraph, followed by the contents. The contents itself contains plain strings mixed with further sub-lists, such as the one marked strong, which indicates that its contents should be displayed as bold. So the markdown parser uses p for a paragraph, strong for sections which should be bold, em for sections which should be italic and code for sections which should be shown in monospaced font.
First, let’s write the insert-markdown function which is the entry point for all the Markdown insertion. It takes an editor and a string in Markdown format, parses it and calls insert-md-items on all the items in the document. The function also sets up an initial “base style” to be used for text, which is passed to insert-md-items. The code which inserts items is wrapped inside begin-edit-sequence/end-edit-sequence calls for the editor, this ensures that the editor will see the insertion as a single operation and will avoid unnecessary display refreshes while the view is set up:
1 2 3 4 5 6 7 8 9 10 11 12 |
(define (insert-markdown editor md-text) (define md (parse-markdown md-text)) (define initial-style-list (list base-style)) (send editor begin-edit-sequence) (insert-md-items editor md initial-style-list) (send editor end-edit-sequence)) (define base-style ; used for default unmodified text (let ([delta (new style-delta%)]) (send delta set-delta-face "Calibri") (send delta set-size-add 4) delta)) |
insert-md-items itself simply iterates over the items and calls insert-md-item which inserts a single item:
The actual work is done in insert-md-item which inserts a single item from the document. If the item is a simple string, it simply calls insert-and-apply-styles function with the current style list, otherwise it checks the type of item it is and recursively attempts to insert the items in the body (this function is mutually recursive with insert-md-items). For each of the markup that we recognize (currently only strong, em and code) we extent the style list with the corresponding style:
1 2 3 4 5 6 7 8 9 10 11 12 13 |
(define (insert-md-item editor item style-list) (if (string? item) (insert-and-apply-styles editor item style-list) (match-let ([(list-rest name attributes body) item]) (case name ((p) (insert-md-items editor body style-list)) ((strong) (insert-md-items editor body (cons strong-style style-list))) ((em) (insert-md-items editor body (cons em-style style-list))) ((code) (insert-md-items editor body (cons code-style style-list))))))) |
And here are the corresponding style definitions:
1 2 3 4 5 6 7 8 |
(define strong-style ; used for bold text (make-object style-delta% 'change-bold)) (define em-style ; used for italic (make-object style-delta% 'change-style 'italic)) (define code-style ; used for monospaced text (let ([delta (new style-delta%)]) (send delta set-delta-face "Consolas") delta)) |
It is relatively a small amount of code, but we can already conveniently insert some text which has some formatting in it:
Paragraphs and Headers
Regardless of how many paragraphs we use in the text in the previous example, the text view will re-flow the text as a single paragraph. This is because all newlines in a text editor are “soft” and the text editor is allowed to reflow the text around them. To create a new paragraph, we need to insert a “hard newline”, which is a string-snip% with the hard-newline flag attached:
We can now update insert-md-items to insert two hard newlines it it is called to insert a new paragraph, which is controlled by the paragraph? argument. Currently, then handling the p item in a markdown document, we’ll set that parameter to #:
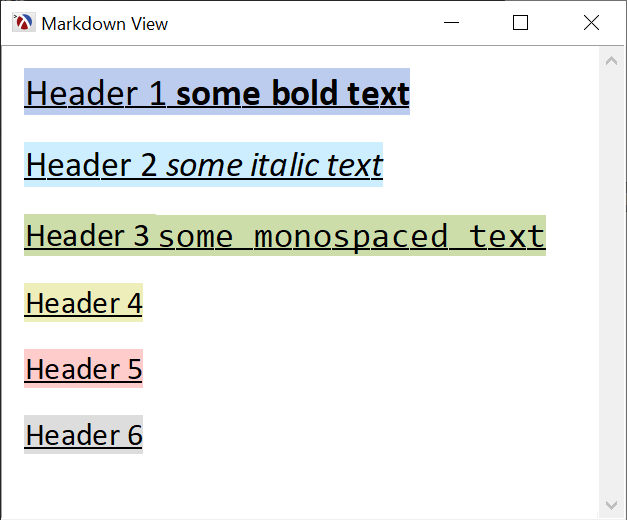
Since we can now recognize paragraphs, it is quite easy to recognize headers, which in markdown are lines prefixed with "#" characters. The markdown parser will create items with the names h1, h2, all the way to h6 for each sub-header level. To make things more interesting, we will use different font sized, but also different colors for the header styles:
1 2 3 4 5 6 7 8 9 10 11 12 13 |
(define (make-header-style font-increase color) (let ([delta (make-object style-delta% 'change-bigger font-increase)]) (send delta set-delta-background color) (send delta set-alignment-on 'base) (send delta set-underlined-on #t) delta)) (define h1-style (make-header-style 5 (make-object color% 187 204 238))) (define h2-style (make-header-style 4 (make-object color% 204 238 255))) (define h3-style (make-header-style 3 (make-object color% 204 221 170))) (define h4-style (make-header-style 2 (make-object color% 238 238 187))) (define h5-style (make-header-style 2 (make-object color% 255 204 204))) (define h6-style (make-header-style 2 (make-object color% 221 221 221))) |
And we can update insert-md-item to recognize the header tags. Note how all header tags pass #t to insert-md-items, since they start new paragraphs:
1 2 3 4 5 6 7 8 9 10 11 12 13 14 15 16 17 18 19 20 21 22 23 24 25 26 |
(define (insert-md-item editor item style-list) (if (string? item) (insert-and-apply-styles editor item style-list) (match-let ([(list-rest name attributes body) item]) (case name ((p) (insert-md-items editor body style-list #t)) ((strong) (insert-md-items editor body (cons strong-style style-list))) ((em) (insert-md-items editor body (cons em-style style-list))) ((code) (insert-md-items editor body (cons code-style style-list))) ((h1) (insert-md-items editor body (cons h1-style style-list) #t)) ((h2) (insert-md-items editor body (cons h2-style style-list) #t)) ((h3) (insert-md-items editor body (cons h3-style style-list) #t)) ((h4) (insert-md-items editor body (cons h4-style style-list) #t)) ((h5) (insert-md-items editor body (cons h5-style style-list) #t)) ((h6) (insert-md-items editor body (cons h6-style style-list) #t)) )))) |
The insert-md-items has become somewhat large and repetitive, but it is still manageable in size. The image below shows how headers are rendered, and also shows how styles are composed, since some of the headers contain bold and italic text and this is correctly composed with the size and color of the header, without any special work from our side:
1 2 3 4 5 6 7 |
(insert-markdown text " # Header 1 **some bold text** ## Header 2 *some italic text* ### Header 3 `some monospaced text` #### Header 4 ##### Header 5 ###### Header 6") |
Hyper-links
Markdown support hyper-links in the document, and we can add support for these in the markdown view as well. A document with hyper-links is parsed as follows:
1 2 |
> (parse-markdown "This is a [link](https://example.com)") '((p () "This is a " (a ((href "https://example.com")) "link"))) |
The link itself is inside an a element, whose body is the link text, while the actual URL is in the attributes section, as the href element.
To implement the hyper-links, let’s start with the styles used to represent them in the view. We need two style deltas, one for the hyperlink as is, and one for when the hyperlink is clicked:
1 2 3 4 5 6 7 8 9 10 11 |
(define hyperlink-style (let ([delta (make-object style-delta%)]) (send delta set-delta-foreground (make-object color% 68 119 170)) (send delta set-underlined-on #t) delta)) (define hyperlink-clicked-style (let ([delta (make-object style-delta%)]) (send delta set-delta-background (make-object color% 68 119 170)) (send delta set-underlined-on #t) delta)) |
Next, we need a function to actually insert the hyperlink text. insert-hyperlink will first insert the items as markdown items by extending the style-list with the hyperlink-style (thus the hyperlink color and underline is added to the style that is already present).
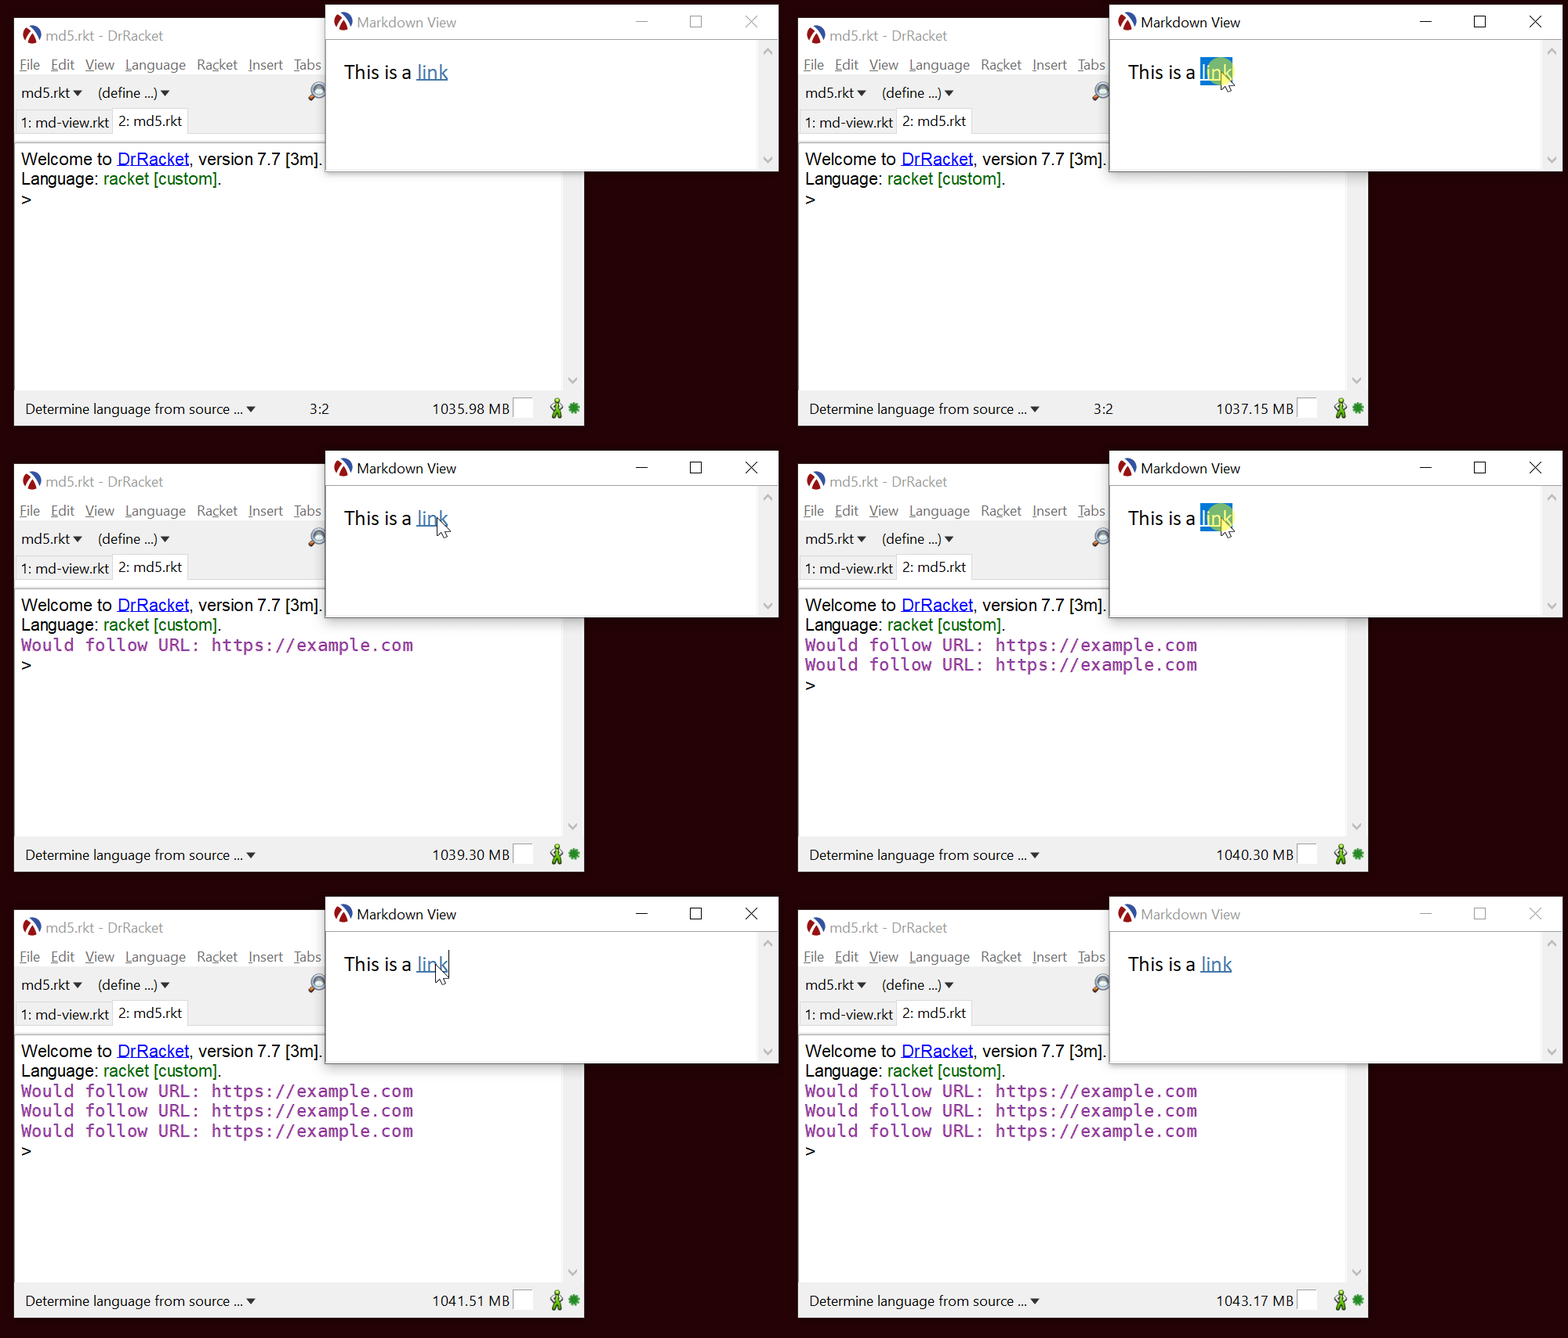
To actually create a link that can be clicked on, the function will use set-clickback method of the text% class to install a callback for when the text is clicked, the function will invoke a callback which can be used for anything — in particular, it could be used to open links inside the application itself, not just for web browsing. Since this is a simple application, we’ll just print out the link target when it is clicked:
1 2 3 4 5 6 7 8 9 10 11 |
(define (insert-hyperlink editor items style-list target) (let ((start (send editor last-position))) (insert-items editor items (cons hyperlink-style style-list)) (define end (send editor last-position)) (send editor set-clickback start end (lambda (editor s e) (printf "Would follow URL: ~a~%" target) ;;(send-url target) ) hyperlink-clicked-style))) |
Finally, we can extend the insert-md-item function to recognize the a tags and add call insert-hyperlink for them:
1 2 3 4 5 6 7 8 9 10 |
(define (insert-md-item editor item style-list) (if (string? item) (insert-and-apply-styles editor item style-list) (match-let ([(list-rest name attributes body) item]) (case name ;; Handling other element types is unchanged ((a) (define target (dict-ref attributes 'href #f)) (insert-hyperlink editor body style-list (and target (car target)))) )))) |
So, we can how insert interactive links in the text editor using the markdown link syntax:
1 |
(insert-markdown text "This is a [link](https://example.com)") |
Images
Markdown also has support for in-line images, and so does the text editor, so we can add support for them too. parse-markdown will parse an image as follows:
The entire image is enclosed in a div block, but we can handle that just as a normal paragraph (p block). The actual image is in the img block and the path to the image is the src attribute of this block.
Here is the function which inserts an image into the editor (images are stored in image-snip% objects). The image is set up in a separate paragraph, and to make it appear centered in the editor, we set the paragraph alignment for the image paragraph to 'centered:
And we update the insert-md-item to recognize both div blocks and img blocks, calling insert-image for the img block:
1 2 3 4 5 6 7 8 9 10 11 12 |
(define (insert-md-item editor item style-list) (if (string? item) (insert-and-apply-styles editor item style-list) (match-let ([(list-rest name attributes body) item]) (case name ((p div) (insert-md-items editor body style-list #t)) ;; Other block types are handled as before ((img) (define image (dict-ref attributes 'src #f)) (insert-image editor (and image (car image)))) )))) |
We can now insert images in the text editor using the following syntax:
1 2 3 |
(insert-markdown text "This is the Racket Logo:  and the racket website is at [www.racket-lang.org](https://www.racket-lang.org)") |

Blockquotes
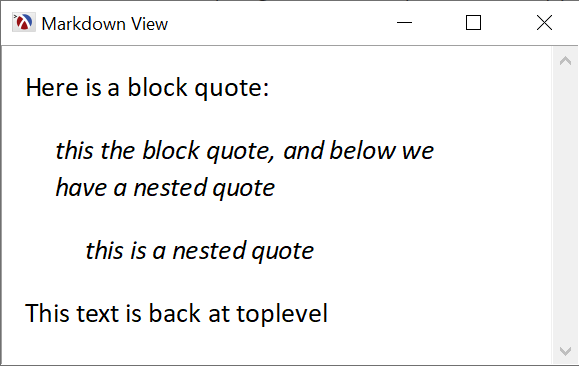
Inserting images showed that, not only we can apply styling to text, but we can also manipulate paragraphs — this functionality will be needed for supporting block quotes. Markdown supports quoting text by prefixing lines with the ">" character and block quotes can be nested.
The Markdown parser created blockquote blocks for text inside the block-quotes, and these can be nested as well. We will display these using slightly slanted text and they will be indented relative to their parent paragraph:
The “slanted” style can be created by using a style delta:
1 2 |
(define bq-style (make-object style-delta% 'change-style 'slant)) |
For the indentation of the paragraph, we need to keep track of the nesting level, and we can do that using a parameter:
1 |
(define paragraph-indent (make-parameter 0)) |
The paragraph indent is increased inside insert-md-item, where the blockquote is handled: the indent is increased by 20 pixels for each level, and the items in the blockquote are inserted using the additional blockquote-style:
1 2 3 4 5 6 7 8 9 |
(define (insert-md-item editor item style-list) (if (string? item) (insert-and-apply-styles editor item style-list) (match-let ([(list-rest name attributes body) item]) (case name ;; Other block handling remains unchanged ((blockquote) (parameterize ([paragraph-indent (+ 20 (paragraph-indent))]) (insert-md-items editor body (cons bq-style style-list)) #t)))))) |
To actually indent the paragraph, the insert-md-items function now looks at the paragraph-indent parameter, and will modify the paragraph margins as each paragraph is inserted:
1 2 3 4 5 6 7 8 9 10 11 12 |
(define (insert-md-items editor items style-list (paragraph? #f)) (when (and paragraph? (not (zero? (send editor last-position)))) (insert-newline editor) (insert-newline editor)) (define paragraph (send editor last-paragraph)) (for ([item (in-list items)]) (insert-md-item editor item style-list)) (when (and paragraph? (> (paragraph-indent) 0)) (send editor set-paragraph-margins paragraph (paragraph-indent) (paragraph-indent) (paragraph-indent)))) |
And that’s all there is to it:
Ordered and Unordered Lists
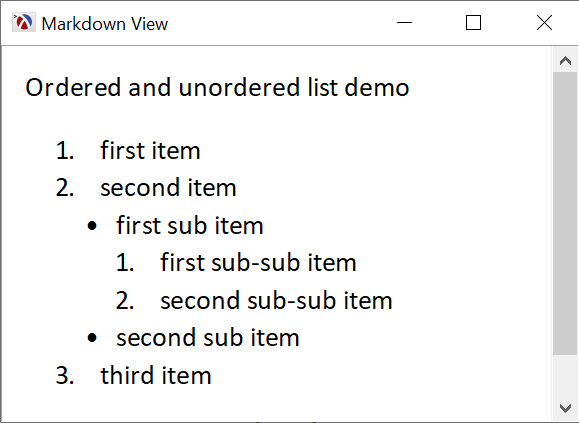
The last feature we’ll look at are lists, both the “ordered” or numbered and unordered kind. These will be handled by prefixing each item with an incrementing number for ordered lists and with a bullet for unordered ones. To keep things simple for a blog post, the numbering scheme and bullet types will not change as the nesting level changes, but this could also be implemented relatively easily.
The markdown parser produces ol and ul blocks for ordered and unordered lists, respectively, and a li block for each list item (a li block is used regardless whether the list is ordered or not. Also, the markdown parser does not keep track of the list item number, we must do that ourselves.
First, we’ll need to keep track of the list nesting level and the number of the current list item, for unordered lists list-item will be #f:
1 2 |
(define list-nesting (make-parameter 0)) (define list-item 1) |
The insert-list-item function is used to insert a list item in a li block, and handles both unordered and ordered lists: it sets the paragraph-indent corresponding to the nesting level and adds a new item to be inserted, either a number for ordered lists or a bullet for unordered ones:
insert-md-items is updated to handle the ul, ol and li blocks as well. To make it look nicer, the code for both ordered and unordered lists
1 2 3 4 5 6 7 8 9 10 11 12 13 14 15 16 17 18 |
(define (insert-markdown-item editor item style-list) (if (string? item) (insert-and-apply-styles editor item style-list) (match-let ([(list-rest name attributes body) item]) (case name ;; Other block handling remains unchanged ((ul ol) (when (zero? (list-nesting)) (insert-newline editor)) (let ((old-list-item list-item)) (set! list-item (if (equal? name 'ol) 1 #f)) (parameterize ([list-nesting (add1 (list-nesting))]) (insert-markdown-items editor body style-list)) (set! list-item old-list-item)) (when (zero? (list-nesting)) (insert-newline editor))) ((li) (insert-list-item editor body style-list)))))) |
So we are able to handle nested lists as well, with only a small amount of additional Racket code:
Final Thoughts
There are a few more element types available in Markdown which would need to be handled to make this a complete application, however, the techniques presented here apply to those elements as well.
Being a visual application, we need to make some decisions on how to represent the markup on screen, and this is currently hard coded, although the style deltas used can be created from a styling description language. Some other parameters are also hard coded, such as how much a paragraph is indented, but these too can be made configurable.
As presented here, the program is just under 200 lines of Racket code, and hopefully it is easy to understand. It need some more polishing for a complete application, but it can be useful even as is, if you want to play with the code, it is available in this GitHub Gist.